We previously looked at the construction of the caterpillar hoops for our soil beds. In order to complete the caterpillar tunnel, we need to cover it with plastic. The end product should look like this:
Our previously completed rib structure looks like this:
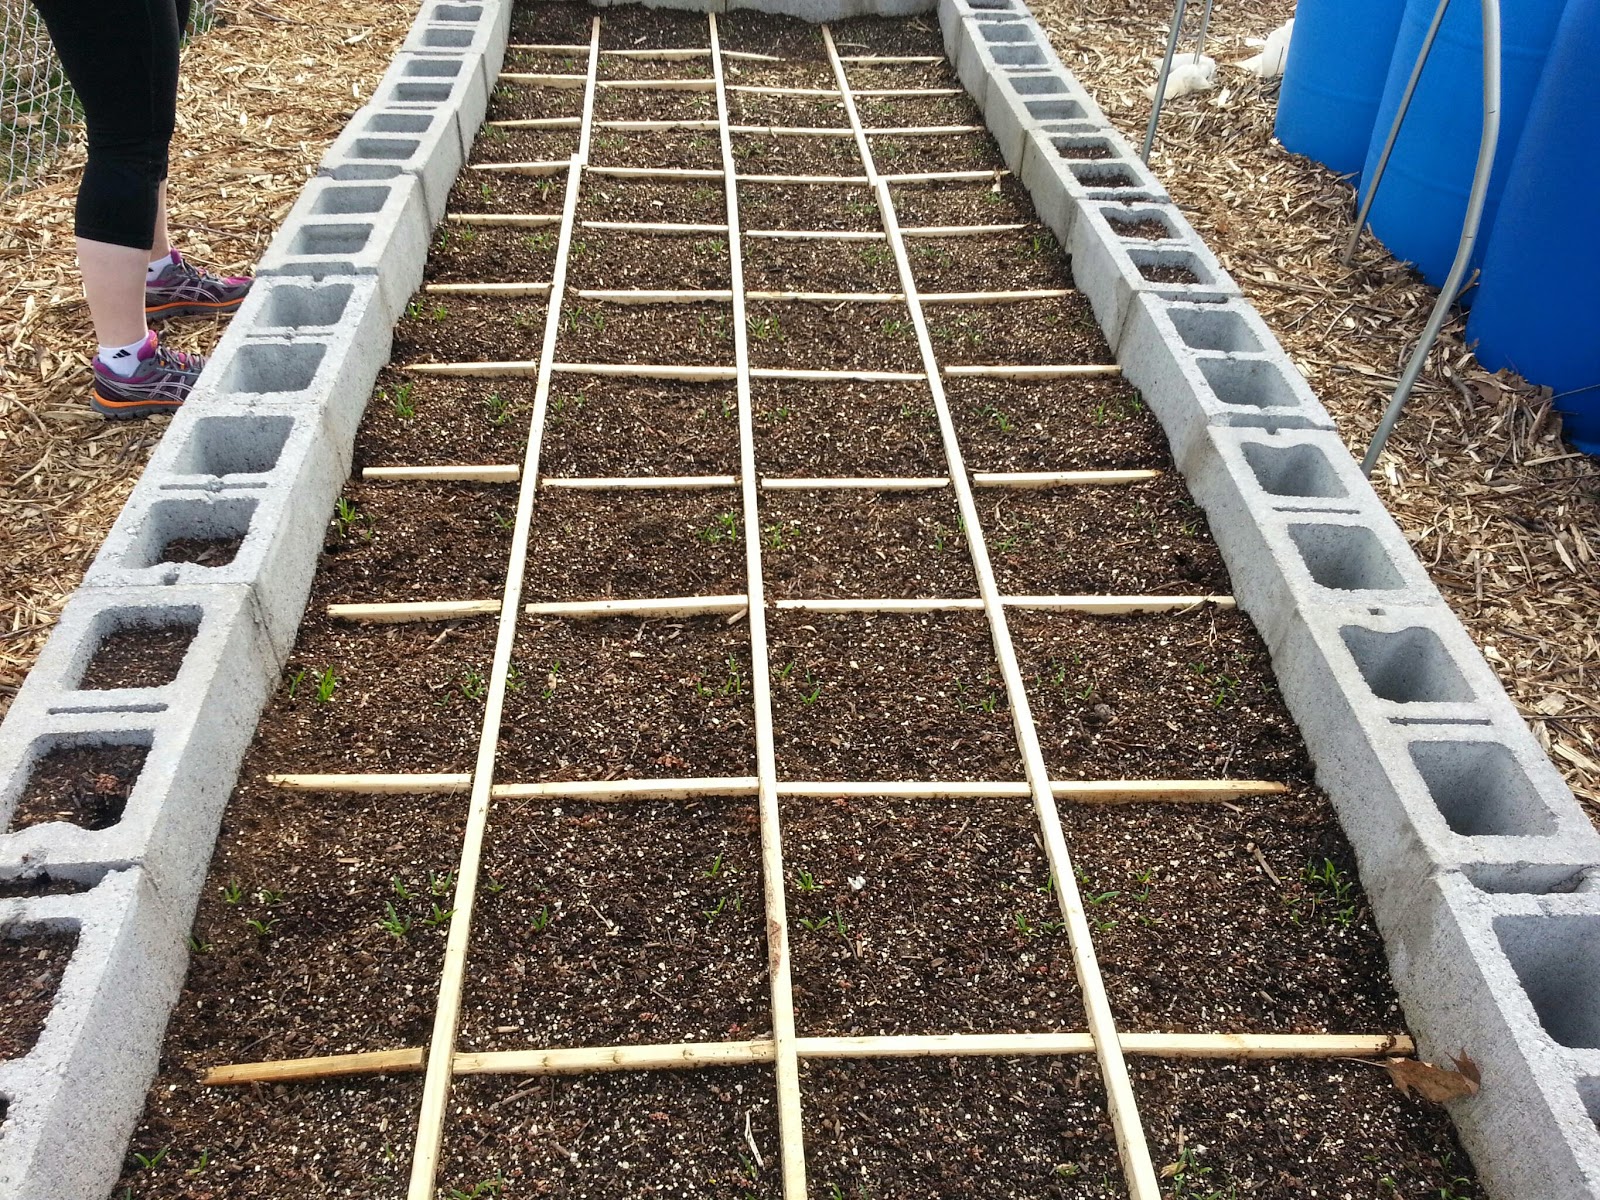
You can see from this photo that our soil bed is already filled with our growth medium mix, Mel's mix. We have also filled in the cinder block holes with the soil mix as we'll be using these little spaces to grow the companion herbs, spices and flowers that attract good bugs and repel bad bugs.
You can see that the little cinder block holes are perfect for this.
We have our 55 gallon plastic water barrels in place to produce passive solar heating for the soil bed. During the day, rays from the sun heat the water in the barrels. At night, the water cools and as it cools, it radiates the built up heat back into the enclosed soil bed and heats the air. This provides frost protection and allows us to extend the growing season.
Our first step is to ensure that the hoops are about the same height. They don't have to be perfect, but it should be about the same height to prevent a camel tunnel.
Our next step is to get our plastic out. You could use any construction plastic, provided it's clear. You could also use specialized green house plastic, but that's expensive so we opted to go with construction plastic. In theory you could use plastic thinner then 4 mil, but I wouldn't recommend it as it wouldn't provide much protection against radiation at night. We decided to go with 6 mil plastic because it is heavy duty and should last a long time. Remember you'll be installing the plastic and removing it again, twice per season so we want it to last. I got the 20' x 100' roll as 20' was going to be wide enough to cover my hoops. I had previously calculated we'll need about 26' wide, but slight tweaks to the hoops and spacing closer to the bed and the barrels allowed the 20' wide roll to work perfectly.
As you can see, 6 mil plastic is thick... very thick. It allows only 60% light through and appears white, but it'll work.
Begin by rolling the plastic out next to the soil bed. Be sure to keep it folded up as it comes off the roll. This allows us to work with the plastic more easily.
IMPORTANT!!! Remember to roll off more than enough plastic along the length of the bed. The plastic is going to cover the bed and then slope down to the ground so some extra is needed. It's better to have too much than too little.
Now pull the plastic over the hoop so as to position it in the center of the hoops. Keep it folded as it came off the roll. From this position, it allows us to straighten and tighten the plastic to the EMT ribs.
When properly positioned, there'll be a little sag between the ribs, but that's OK.
Now we need to secure our plastic to the EMT hoops. There's many ways to do this, I'm sure, but the easiest and most efficient way to do it, is to buy these 1/2" EMT plastic clips from Johnny's.
They are well designed with an edge that tapers away from the plastic to minimize piercing of the plastic around the fasteners. Additionally, they have a ribbed inside surface which prevents the plastic from slipping or pulling loose. Though not cheap, these little babies are a major time saver so I recommend getting these.
Now go ahead and clip the plastic to the EMT ribs just to the side of the joint between the two pipes.
Once you have the center clipped, begin unrolling one side of the plastic down the ribs.
Attach a second set of clips half way between the first and the ground.
Repeat for all ribs and then unroll the plastic all the way to the ground.
Finally, another set of clips attach just about the ground level.
There should be some excess plastic at the ground level. This can be cut away later.
Now repeat the process for the other side of the hoop. Once the plastic is attached to the hoops, pull the openings on either end together in a V shape and stake it into the ground.
Here's the completed result:
It is important to note that practicality plays a larger role than theory. This is a good example of that. The reason I designed the tapered V was to break the wind and allow stronger resistance for the tunnel in high wind conditions. In practice however, 6 mil plastic is thick and cumbersome to work with so pulling the tapered V together was not easy. Additionally, when it rains, water collects in the tapered V creating a mess. Access to the tunnel is also not as easy and the stake just doesn't quite seem to hold up so well when you are entering and leaving the tunnel on a daily basis.
This is where you'd have to weigh the risk of your tunnel getting blown away against the ease of use of the tunnel. Creating a flat edge is easier to work with but risk high wind issues. The choice is ultimately yours...